Implementing Support for Continuity Camera
Thursday 18. October 2018 12:39:43 UTC+01:00 -
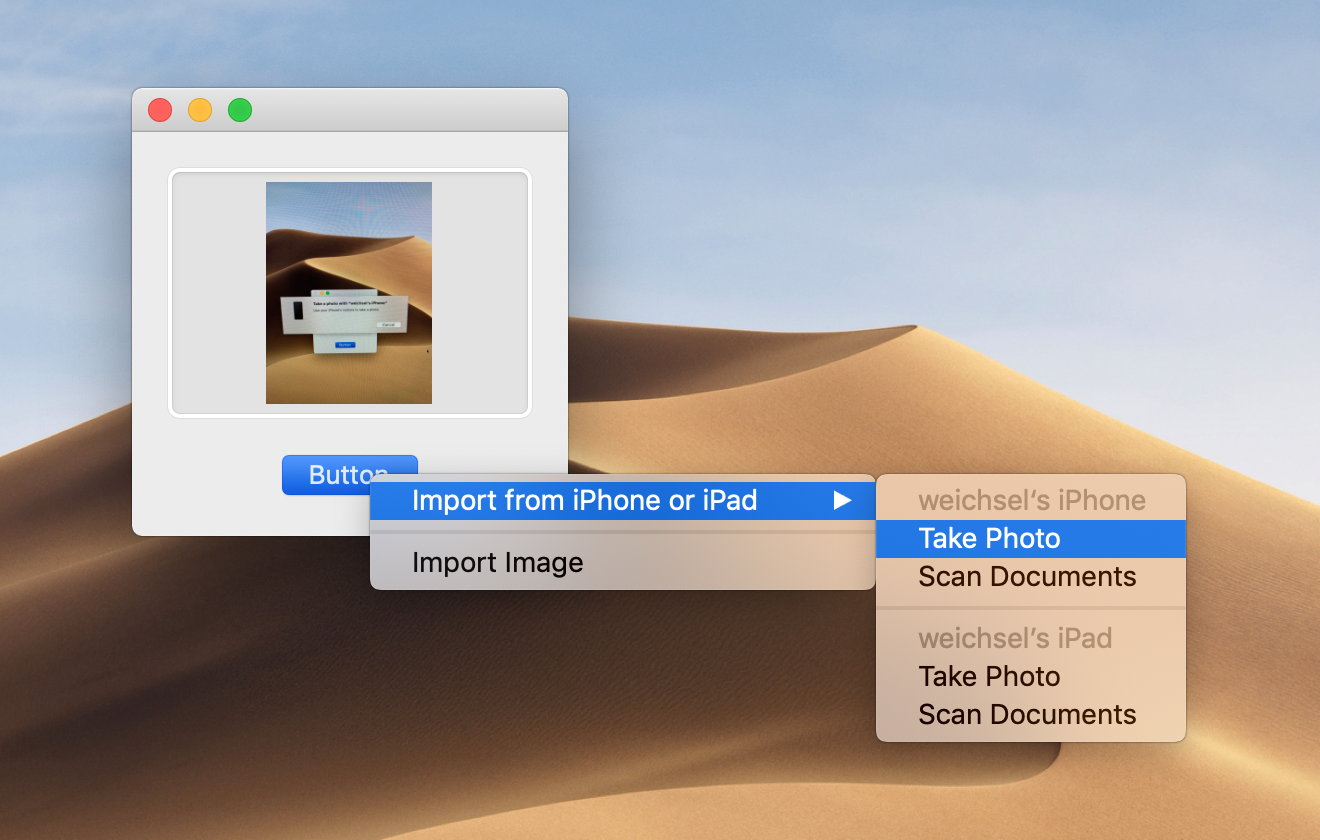
One of macOS Mojave's user-facing features is Continuity Camera. It allows you to capture images or documents from your iOS devices.
While Apple prominently showcases the feature on the Mojave product page, documentation for developers is very thin. There's only a
short mention
of the related APIs in the "What's new in Cocoa" WWDC 2018 session.
Some of AppKit's default view classes support the feature out of the box (e.g. NSTextView
), but it's also possible to add capturing to your own controls.
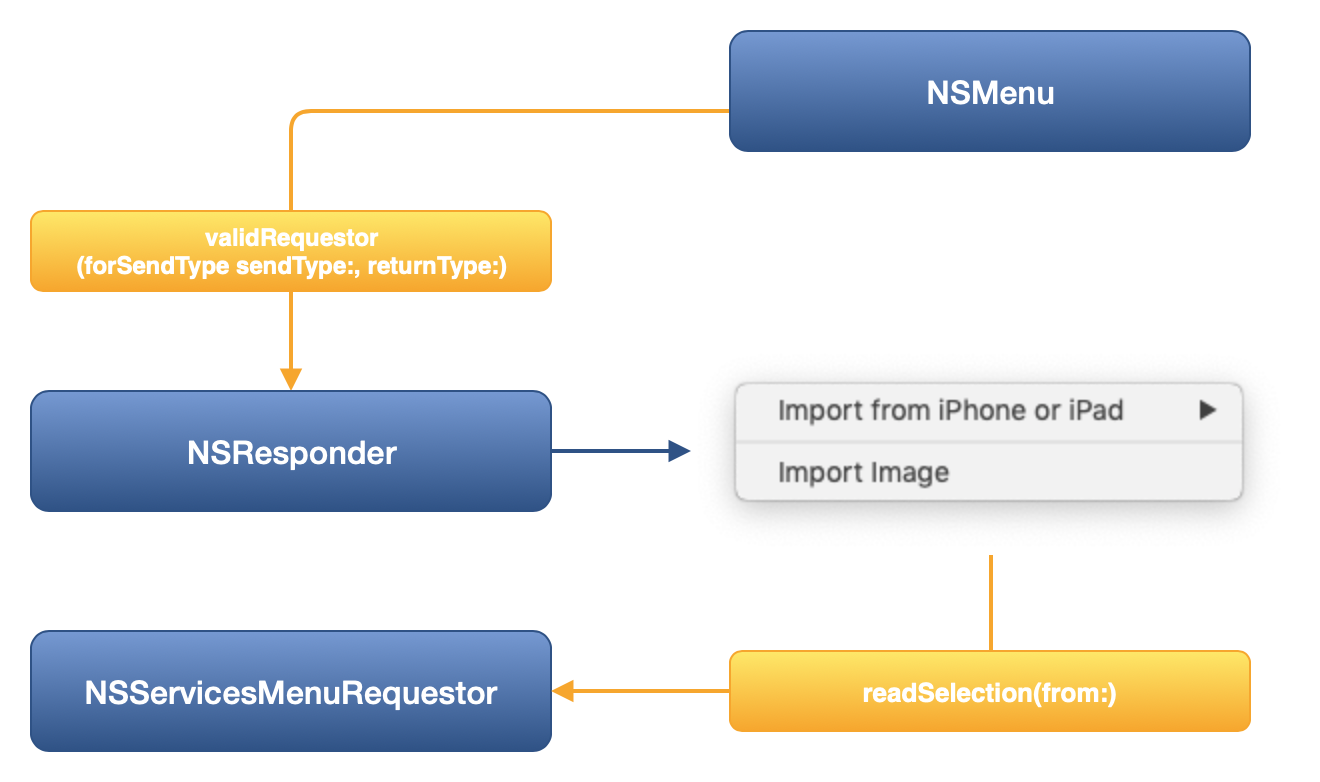
Apple implemented Continuity Camera on top of the Services infrastructure of macOS and NSResponder
. Captured image data is passed in via NSPasteboard
.
To make the "Import from iPhone or iPad" menu item appear in a menu, we have to implement
validRequestor(forSendType:returnType:)
in a NSResponder
subclass (e.g. in a view controller). From there, we need to return an instance that implements the NSServicesMenuRequestor
protocol.
I created a
small sample project
that provides a simple implementation of the above methods. It consists of a view controller that hosts an NSImageView
and a button. The button has an empty menu connected, which gets popped-up when the button's action is performed.
The view controller is a subclass of NSResponder
and it also implements NSServicesMenuRequestor
. So when the macOS Services architecture traverses the responder chain, it asks if we accept images from the pasteboard via validRequestor(forSendType:returnType:)
. As we indicate true
by returning self
, the menu gets populated with the Continuity Camera menu items. Those items dispatch their actions via the Responder Chain, so it is important that the view controller that handles the passed in image is firstResponder
. Otherwise, menu validation fails and the Continuity Camera items are disabled. To ensure that, we call self.view.window?.makeFirstResponder(self)
before showing the menu.
After the user captured an image on the selected iOS device, we need to handle the returned image in
readSelection(from pasteboard: NSPasteboard)
(which is part of NSServicesMenuRequestor
). The sample app reads the captured image from the pasteboard and displays it in an image view. You can download the Xcode project
here
.
Special thanks go out to Michael Schwarz . He implemented Continuity Camera support for MindNode for Mac and shared his insights with me.